How-to
How to make medical diagrams with AI: the sketch-first workflow that produces exam-grade anatomy illustrations in 2026
Updated 1 June 2026 · 12 min read
How to make medical diagrams with AI is one of the most searched questions in medical education, and most of the answers are wrong. The tools that produce accurate diagrams are not the ones you have heard of. ChatGPT, Midjourney, and DALL-E generate visually impressive, anatomically wrong illustrations that look correct until you compare them to a textbook. The workflow that works is sketch-first: you draw the structure, however rough, and the AI's only job is to render a clean, labelled version of what you already drew. This guide is the complete process: why text-to-image fails, how sketch-first architecture preserves accuracy, the exact six-step workflow, and the five diagrams that will earn you the most marks for the least effort.
Why text-to-image tools fail for medical diagrams
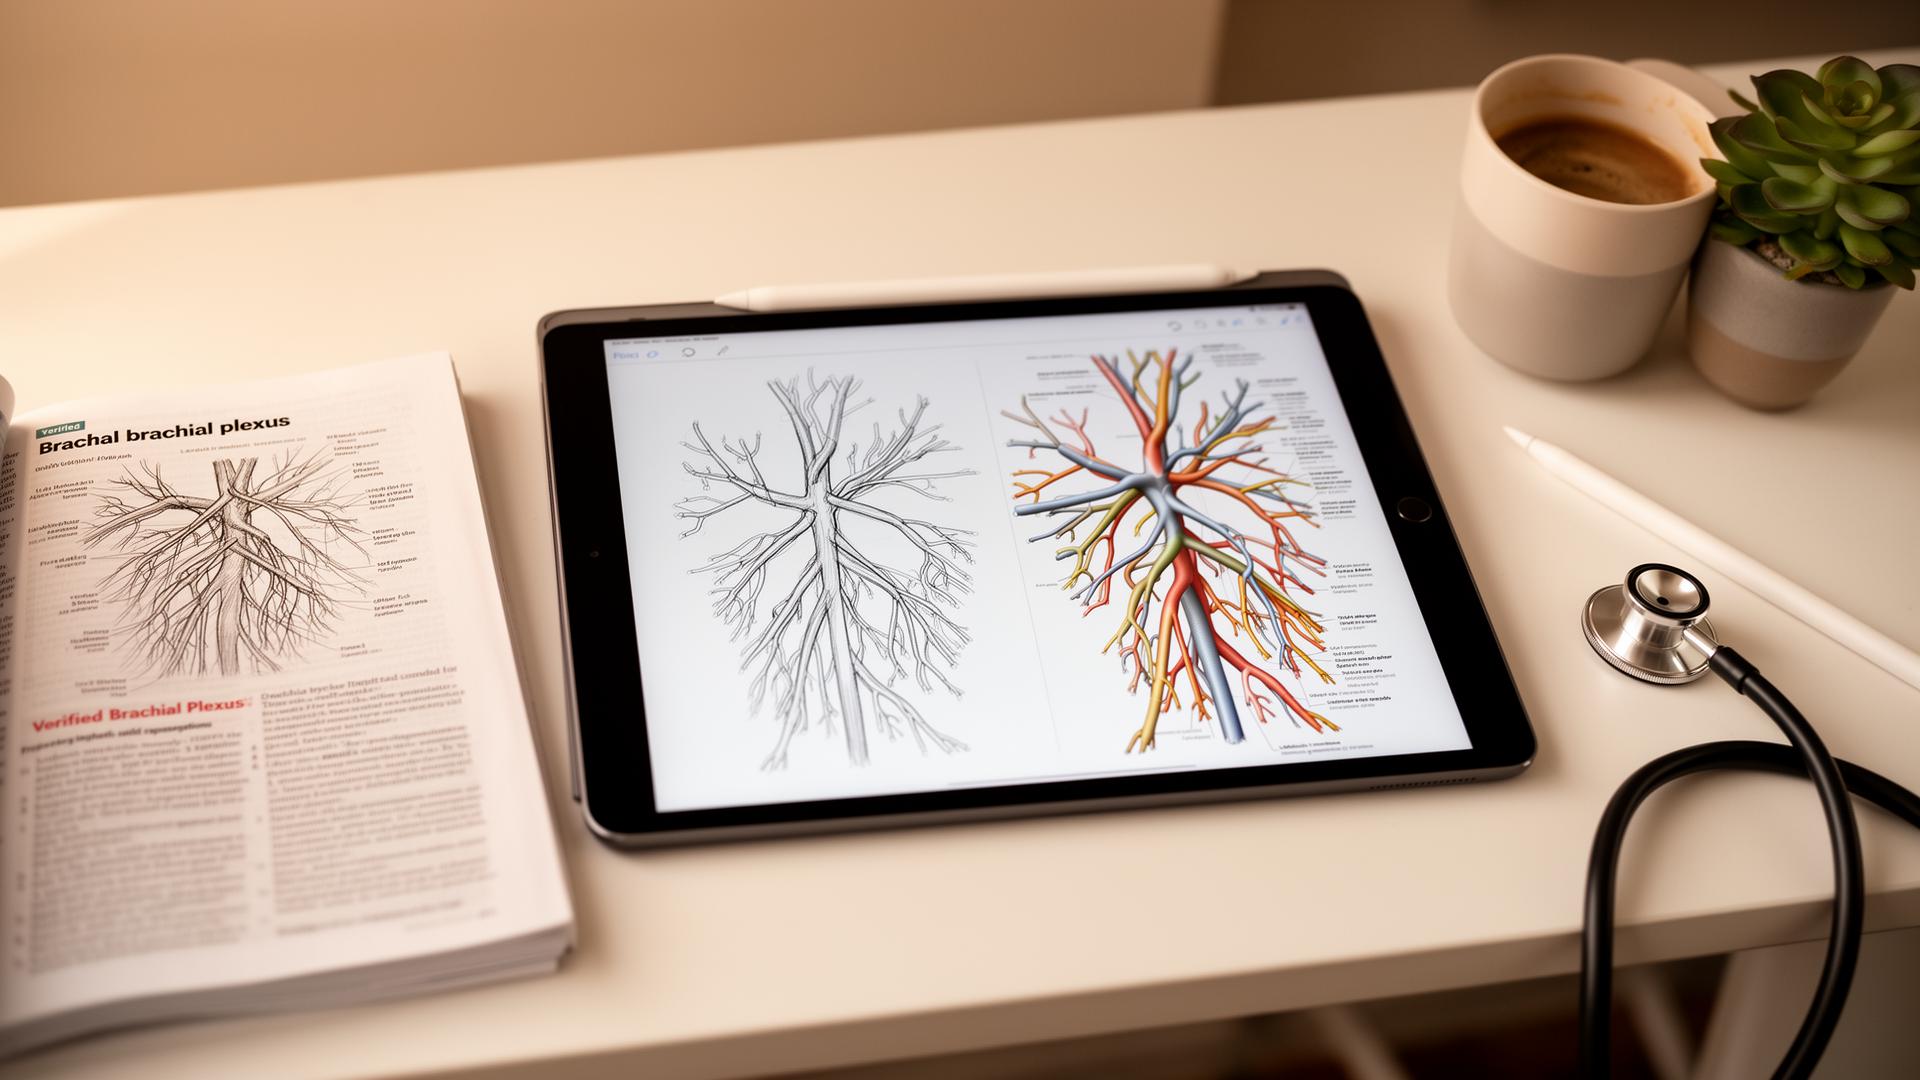
When you type 'brachial plexus diagram' into a general text-to-image model, the system has seen thousands of brachial plexus diagrams during training: some correct, some wrong, many simplified for textbooks, some from medical artists with stylistic flourishes. The model averages them. The output is statistically plausible and individually wrong: roots may be misnumbered, branches invented, spatial relationships mirrored, and labels placed on structures that do not exist.
The model has no internal model of anatomy. It does not know that the brachial plexus has five roots, three trunks, six divisions, three cords, and five terminal branches. It knows that images labelled 'brachial plexus' tend to have a certain visual pattern, and it reproduces that pattern. The result is an image that looks like a brachial plexus diagram, not a brachial plexus diagram. Across published spot-checks of generic text-to-image models on complex anatomical structures, at least one anatomical error appears in the majority of generations. See the ai-medical-illustration guide for the full technical explanation of how text-to-image hallucination works in medicine.
How sketch-first architecture preserves accuracy
A sketch-first tool works differently. Instead of generating an image from a text description, it takes your hand-drawn sketch as the primary input and uses AI only for rendering, labelling, and polish. The topology of the anatomy, the connections between structures, the spatial relationships: all of these come from your sketch. The AI cannot invent a branch you did not draw because it has no authority to add structures.
The model's job is limited to three things: cleaning up your rough lines into professional illustration style, positioning labels and connector lines in anatomically conventional locations, and applying consistent shading, colour, and depth. If your sketch is correct, the output is correct. If your sketch is wrong, the output is wrong in exactly the same way, which means you can catch the error by comparing your sketch to a textbook in under a minute.
| Dimension | Text-to-image (ChatGPT, Midjourney) | Sketch-first (Angiosome) | Impact on accuracy |
|---|---|---|---|
| Structure source | Invented by model from training data | Provided by your sketch | Sketch-first: structure is human-controlled |
| Error type | Subtle, plausible, hard to spot | Same as your sketch, easy to verify | Sketch-first: errors are yours to catch |
| Label accuracy | May label invented structures | Labels only what you drew | Sketch-first: no phantom labels |
| Reproducibility | Same prompt gives different output | Same sketch gives same structure | Sketch-first: deterministic |
| Exam safety | Unsafe: may teach wrong anatomy | Safe if sketch is verified | Sketch-first: defensible for exams |
| Publication safety | Most journals reject fully AI-generated figures | More defensible: original sketch is yours | Sketch-first: easier to disclose |
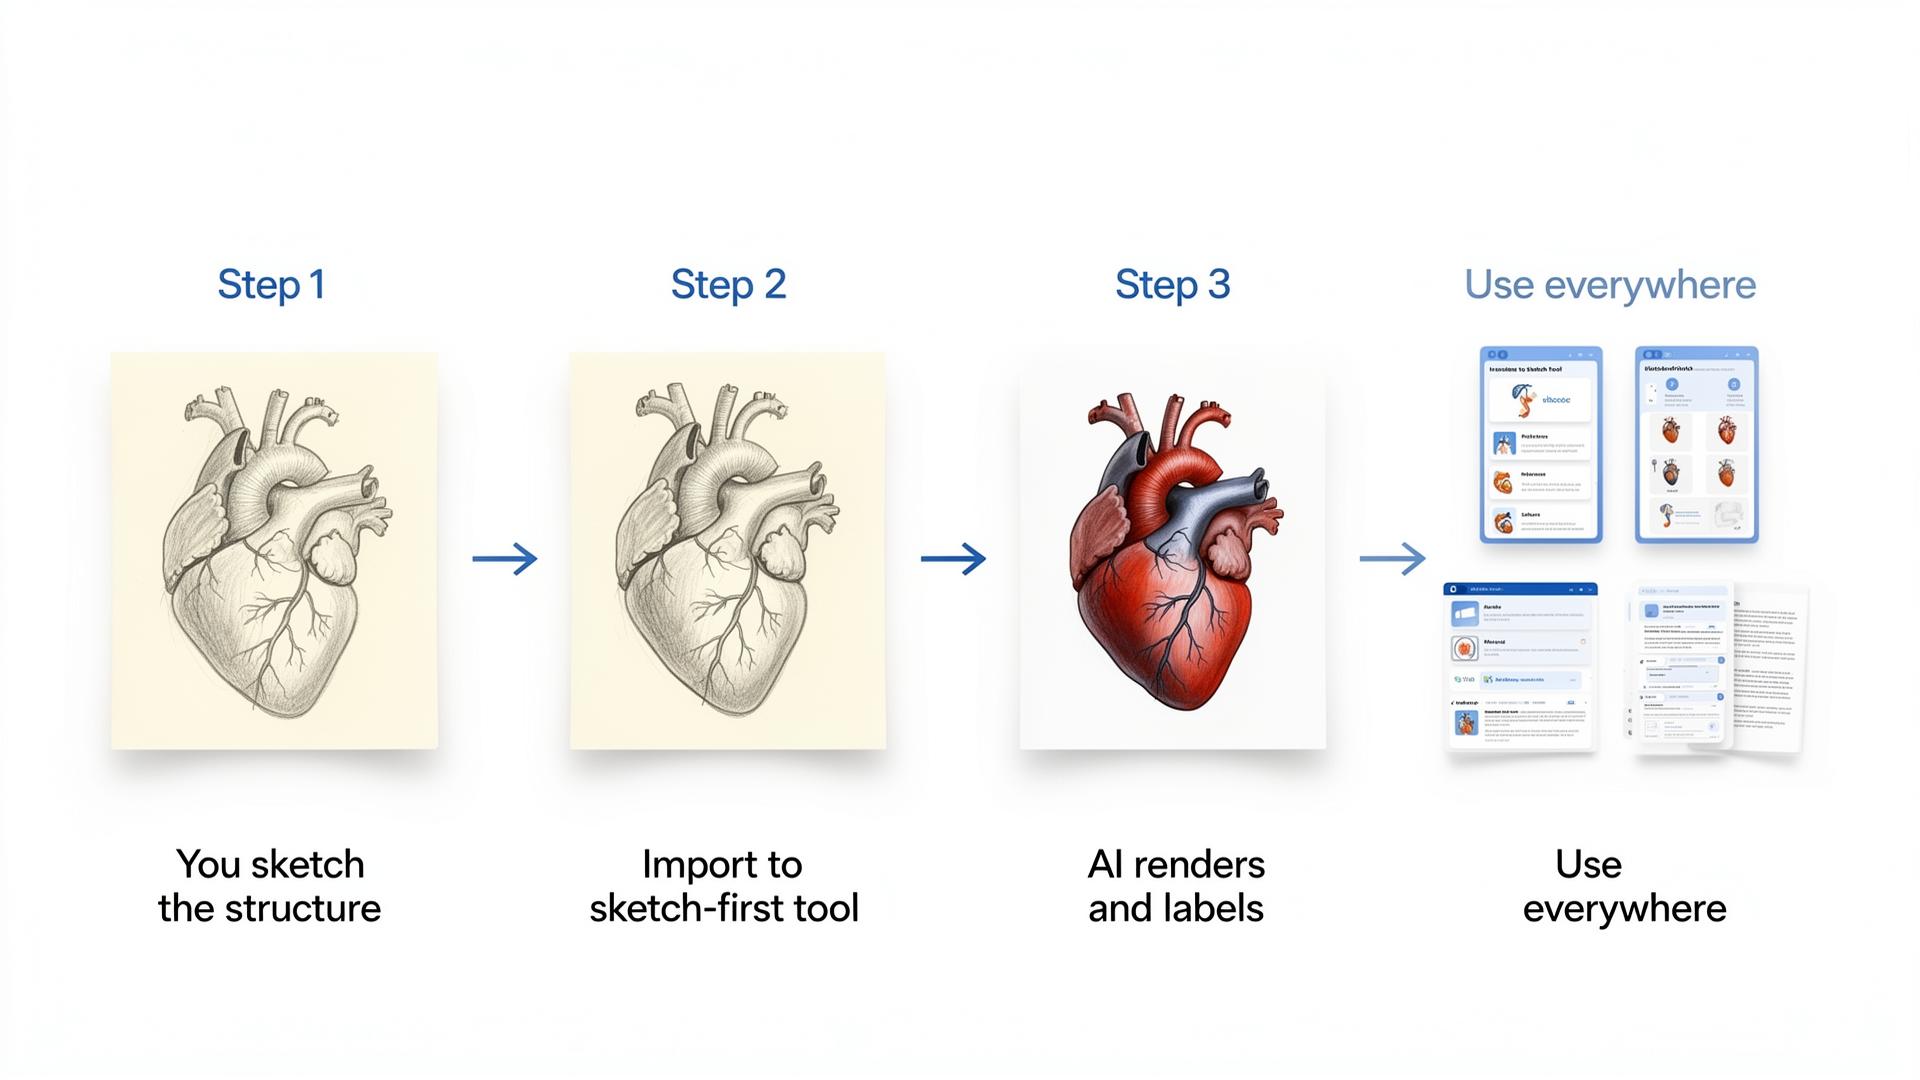
The six-step sketch-first workflow
This workflow takes 2–5 minutes per diagram once you have practised it two or three times. The first diagram will take longer because you are calibrating the tool to your drawing style. After that, it is faster than redrawing a diagram neatly by hand and far more accurate than trusting a text-to-image model.
- Sketch the structure yourself. Pen on paper, finger on a phone, Apple Pencil on iPad: the medium does not matter. Rough is fine; correct is essential. Draw the topology, not the art. Five squiggly lines in the right order are better than one beautiful line in the wrong place.
- Capture the sketch. Photograph paper sketches with your phone in good light. On a tablet, draw directly in the sketch-first tool or export as PNG. The quality of the capture matters: shadows, folds, and blur confuse the model.
- Import and describe. Load the sketch into the sketch-first tool and describe what it is: 'brachial plexus, posterior view, medical textbook style.' The description tells the model which anatomical conventions to apply, not what to draw.
- Generate the rendered version. The model returns a clean, photoreal or line-art version of your sketch with professional labels positioned according to anatomical convention. This takes 30–60 seconds.
- Verify against your reference. Compare the output to Gray's Anatomy, your course textbook, or Radiopaedia for one minute. Check the number of branches, their connections, and the labels. If the model added or moved a structure, it means your sketch was ambiguous. Sketch that area more explicitly and re-generate.
- Save and distribute. Export as PNG or SVG. Use in Anki image-occlusion cards, case presentation slides, patient education handouts, or printed notes. The same diagram, reused in three contexts, is worth more than three different diagrams used once.
| Step | Time | Critical? | Common mistake |
|---|---|---|---|
| Sketch | 1–3 minutes | Yes: accuracy lives here | Trying to make it pretty instead of correct |
| Capture | 30 seconds | Yes: bad photos confuse the model | Shadows, folds, or low resolution |
| Import and describe | 30 seconds | Yes: wrong description, wrong conventions | Vague descriptions like 'a nerve diagram' |
| Generate | 30–60 seconds | No: just waiting | None |
| Verify | 1 minute | Yes: catch errors before trusting | Skipping verification because the image looks good |
| Save and distribute | 1 minute | Yes: make it reusable | Saving only for one use |
What you provide and what the model provides
The boundary between human and AI responsibility is the key to safe medical illustration. Knowing exactly what is yours and what is the model's prevents both over-reliance and unnecessary manual work.
| You provide | The model provides | Why the boundary matters |
|---|---|---|
| Overall structure and topology | Polish: clean lines, anatomical colours, depth | You control accuracy; the model controls aesthetics |
| Labels you want named | Label positioning and connector line routing | You decide what to test; the model places text legibly |
| Approximate proportions | Final proportions, shading, texture | Rough proportions are enough; the model refines |
| Anything where accuracy matters | Anything purely cosmetic: background, style, colour palette | The model cannot harm what it cannot change |
| Verification against textbook | None: the model does not verify itself | You must check every output; the model will not catch your errors |
Five diagrams every medical student should master
These five structures appear in exams, case presentations, and clinical teaching more often than almost anything else. They are also drawable in under three minutes each once you have practised. Master these and you have a reusable diagram library for your entire degree.
- The cardiac conduction system: SA node, AV node, bundle of His, left and right bundle branches, Purkinje fibres. Exam-favourite, easy to confuse the bundle branches, and essential for explaining arrhythmias to patients. Sketch time: 2 minutes.
- The brachial plexus: C5–T1 roots, three trunks, six divisions, three cords, five terminal branches. The standard stress test for any medical illustration tool because it is complex, well-documented, and easy to verify against any anatomy textbook. Sketch time: 3 minutes.
- Cranial nerves at the base of the skull: I olfactory through XII hypoglossal, with their exit foramina. Visual, spatial, and exactly the kind of structure that image occlusion in Anki turns into easy exam points. Sketch time: 3 minutes.
- The portal venous system: portal vein, splenic vein, superior mesenteric vein, hepatic veins, and the connection to the systemic circulation. Once you can draw this from memory, you can explain portal hypertension, oesophageal varices, and hepatic encephalopathy to a patient in under 60 seconds. Sketch time: 2 minutes.
- The nephron: glomerulus, Bowman's capsule, proximal convoluted tubule, loop of Henle, distal convoluted tubule, collecting duct. Long, structural, and far easier to memorise from a clean diagram than from paragraphs of text. Sketch time: 3 minutes.
| Diagram | Exam frequency | Patient education value | Sketch time | Anki image-occlusion value |
|---|---|---|---|---|
| Cardiac conduction system | Very high | High (explains arrhythmias) | 2 min | High |
| Brachial plexus | Very high | Medium | 3 min | Very high |
| Cranial nerves (skull base) | High | Medium | 3 min | Very high |
| Portal system | High | Very high (explains liver disease) | 2 min | High |
| Nephron | High | High (explains renal failure) | 3 min | High |
Common failure modes and how to fix them
Even sketch-first tools produce errors when the sketch is ambiguous or the description is vague. These are the five most common failure modes and the exact fixes for each.
| Failure mode | What went wrong | The fix | Prevention |
|---|---|---|---|
| Wrong number of branches | Sketch was ambiguous about branch count | Re-sketch with explicit branch count labelled | Write numbers on your sketch before capturing |
| Labels point to wrong structures | Sketch had unclear label anchors | Label your own sketch first, let AI match | Draw small label lines on your sketch |
| Left-right mirroring | Model defaulted to a standard view | Add 'right side, patient's perspective' to description | Always specify left/right and view in description |
| Over-stylised output | Default style was illustrative, not textbook | Change render style to 'photoreal' or 'line art' | Specify style in every description |
| Missing small structures | Sketch was too rough in one area | Zoom in and re-sketch that region more explicitly | Check every region against textbook before generating |
Using your diagrams across your study stack
A diagram you make once and use once is a waste of two minutes. The leverage comes from reuse. A verified, clean diagram belongs in three places minimum.
- Anki image-occlusion cards: drop the diagram into the image-occlusion add-on, hide the labels, and test yourself on naming every structure. This is the highest-value reuse for anatomy-heavy modules. See the anki-ai-workflow-for-med-school guide for the full setup.
- Case presentation slides: replace generic stock images with your own verified diagram. The slide now matches your case exactly and stops looking AI-generated. See the ai-presentations-for-medical-school guide for the deck workflow.
- Printed or digital notes: embed the diagram in your module notes alongside the relevant text. Visual memory and verbal memory reinforce each other when they are co-located.
- Patient education handouts: simplified versions of your diagrams, with lay language labels, are excellent for explaining conditions to patients. Just ensure the diagram is accurate enough to defend to a consultant.
The hardest part of medical school is repetition with variation. The same diagram, encountered in three different contexts (flashcards, presentation, notes), creates stronger memory traces than three different diagrams each seen once. Build a personal diagram library and reuse it ruthlessly.
Exams, publication, and clinical safety
The same diagram can be safe for one context and unsafe for another. Understanding the boundary protects your marks, your publications, and your patients.
For exam revision, sketch-first diagrams are safe provided you verify them against a primary source before memorising them. The risk is lower than text-to-image because the structure comes from your own drawing, but verification is still essential. A wrong sketch rendered beautifully is still wrong.
For publication, journal policies have tightened since 2023. The ICMJE requires disclosure of AI use in manuscript preparation. Nature does not accept fully AI-generated figures. JAMA and the BMJ allow AI-assisted images with disclosure. A sketch-first workflow is more defensible under these policies because the original creative structure is yours; the AI's role is limited to rendering and labelling, which is closer to digital enhancement than to generation.
For patient education, accuracy is paramount. A diagram shown to a patient must be defensible to a consultant and safe for the patient to act on. Never show a patient a diagram you have not verified against a trusted source. The medicolegal implications of distributing inaccurate patient education material are significant under GMC 2024 guidance.
What to read next
If you want the full explanation of why text-to-image models hallucinate anatomy, the ai-medical-illustration pillar covers the technical architecture. If you want to compare sketch-first tools against BioRender and other alternatives, the biorender-alternatives guide has the full comparison matrix. For the Anki workflow that turns these diagrams into retained memory, see the anki-ai-workflow-for-med-school guide. For presentation-specific advice on replacing stock images, the ai-presentations-for-medical-school guide has the 20-minute workflow.
Sources
- Gray's Anatomy — 42nd Edition — Elsevier
- Radiopaedia — free radiology and anatomy reference — Radiopaedia.org
- ICMJE — Recommendations for the Conduct, Reporting, Editing and Publication of Scholarly Work — International Committee of Medical Journal Editors
- Nature — Policy on AI-generated images and video — Nature Portfolio
- GMC — Good medical practice (2024 update) — General Medical Council
- JAMA — Instructions for Authors — American Medical Association
- BMJ — Authorship and contributorship — BMJ Publishing Group
- OpenAI — DALL-E 3 system card — OpenAI
Frequently asked questions
What AI can generate accurate medical diagrams?
Sketch-first tools like Angiosome produce accurate medical diagrams because they render and label structures you draw yourself, rather than inventing anatomy from text prompts. Generic text-to-image tools like DALL-E, Midjourney, and ChatGPT image generation are unsafe for medical accuracy because they have no internal anatomical model and hallucinate structures.
Can ChatGPT make medical diagrams?
ChatGPT's image generation can produce visually impressive medical illustrations, but they are frequently anatomically wrong. It invents nerve branches, mirrors organs, and creates structures that do not exist. For exam-grade diagrams, patient education, or publication, use a sketch-first tool where you control the underlying anatomy.
Are AI medical diagrams safe for exam revision?
Sketch-first diagrams are safe for exam revision if you verify them against a trusted textbook like Gray's Anatomy or Radiopaedia before memorising them. Text-to-image diagrams are unsafe because the model may invent structures you then memorise incorrectly. Always cross-check any diagram, however it was made, against a primary source.
Can I publish AI-generated medical diagrams?
Journal policies vary. ICMJE 2023 requires disclosure of AI use. Nature does not accept fully AI-generated figures. JAMA and the BMJ allow AI-assisted images with disclosure and author responsibility. Sketch-first workflows are generally more defensible because the original sketch is your own creative work. Always check your target journal's specific policy before submission.
How long does it take to make one medical diagram with AI?
The sketch-first workflow takes 2–5 minutes per diagram once calibrated: 1–3 minutes to sketch, 30 seconds to capture and describe, 30–60 seconds for the AI to render, and 1 minute to verify against a textbook. The first few diagrams take longer while you learn the tool; after that it is faster than redrawing neatly by hand.
What is the difference between sketch-first and text-to-image for medical diagrams?
Text-to-image generates an image from a description and invents the underlying anatomy. Sketch-first generates an image from your drawing and only renders what you drew. For medicine, the difference is critical: text-to-image produces plausible-looking wrong anatomy; sketch-first produces polished versions of structures you already verified.
Can I use AI diagrams for patient education?
Yes, if they are sketch-first and verified against a trusted source. Patient education diagrams must be accurate enough to defend to a consultant and safe for the patient to act on. Never show a patient a text-to-image diagram that has not been independently verified. The medicolegal implications of distributing inaccurate patient material are significant.
Do I need to be good at drawing to use sketch-first tools?
No. The sketch only needs to be topologically correct, not artistically good. Five rough lines in the right order are better than one beautiful line in the wrong place. The AI handles the polish, shading, and labelling. Your job is to get the structure right, which any medical student can do with a textbook open beside them.
Try it
Sketch it. Angiosome renders it.
Angiosome turns rough medical sketches into clean, labelled, photoreal diagrams — grounded in your sketch, not invented by a model. Free to try.
Open Angiosome →Keep reading
Pillar
AI Medical Illustration: The Honest Guide (2026)
How-to
How to Make Anatomy Diagrams with AI (2026)
How-to
How to Illustrate Medical Notes with AI (2026)
Pillar
Best AI Tools for Medical School (2026, Ranked)
Comparison
BioRender Alternatives 2026: Honest Comparison
Tool deep-dive
Anki + AI Flashcards: Med School Workflow